Now that the older Lexus engines are around 15 years old you might see one smoking a little bit when started. This is a good indicator that the valve seals are worn out. I would recommend changing them out anyways just because they deteriorate after so many years.
Below you’ll see some pretty shocking pictures of just how bad they get. All-Data systems calls for an hourly estimate of 18 hours for an automotive shop to do this operation. That is quite a bit of time and once you look over my walk through you should be ready to cut that time in half yourself. As long as you get a hold of the right tools you should be ready to start.
It is a very good idea to have a Lexus service manual handy for this engine. You will want to follow the cylinder head disassembly instructions. You can also find this section in PDF format on forums.
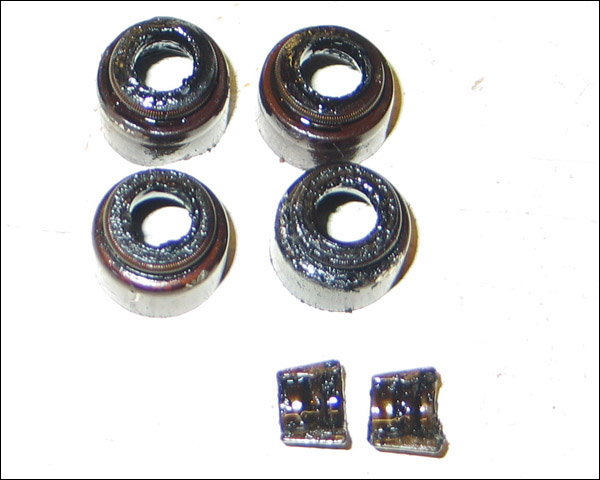
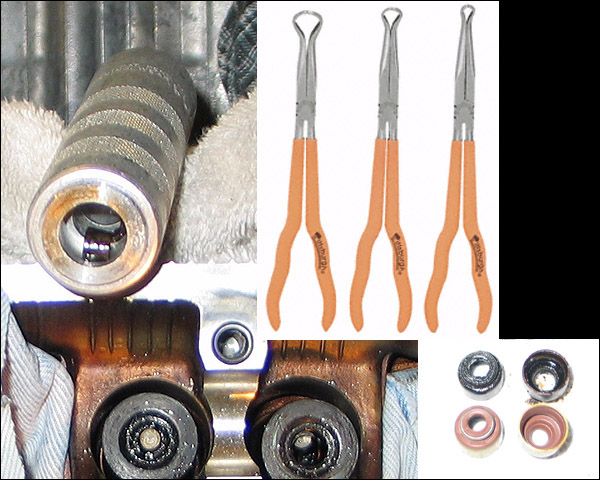
I took some nice hi-res pictures because the faqs I’ve seen on the subject really don’t give a clear picture of what’s going on. The old seals were in pretty bad shape so let me show a nice picture of the whole reason I’m changing these out.
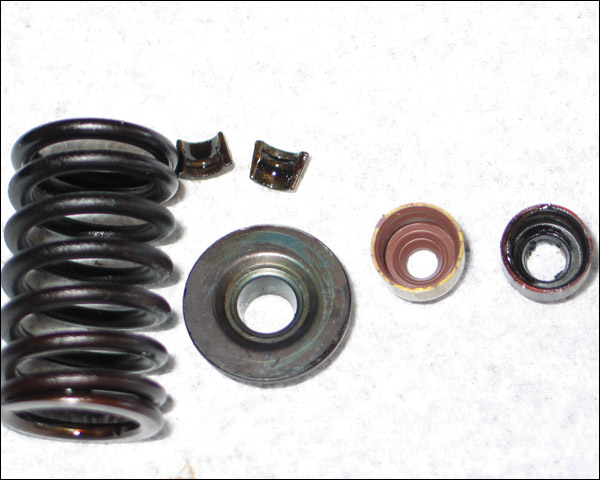
The keepers for the valve spring retainers are to the bottom of this picture. You don’t want to lose any one of these. There are 2 per valve so that makes 64 in total. BE VERY CAREFUL not to lose any. If you lose one you will have to halt your whole project and order another one.
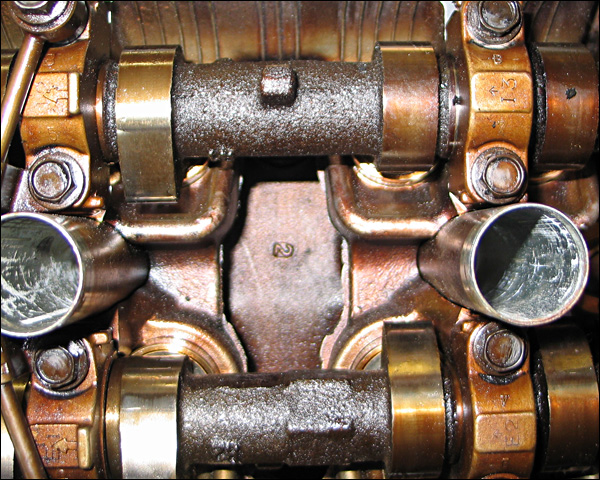
Put the camshafts to the side with all of the caps (called bearing caps in the Lexus manual). Keep in mind that the caps are all numbered and must be placed back over the camshaft in order.
If you don’t remember what order they go in make sure and refer to the Lexus manual for the order and also the torque specs as well. With the cams removed now pull out the buckets and place them to the side in order. Notice the numbers and arrows below.
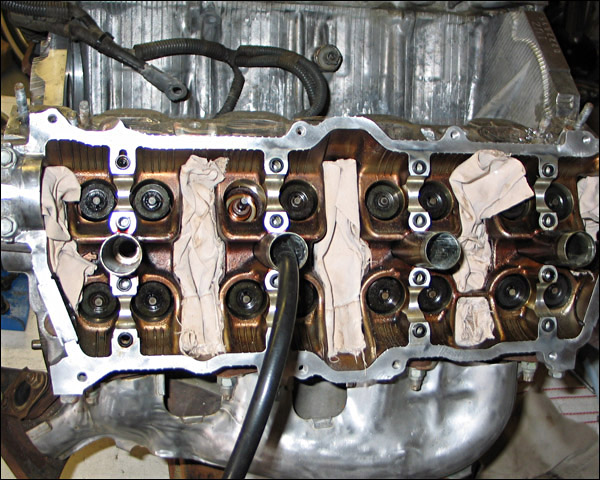
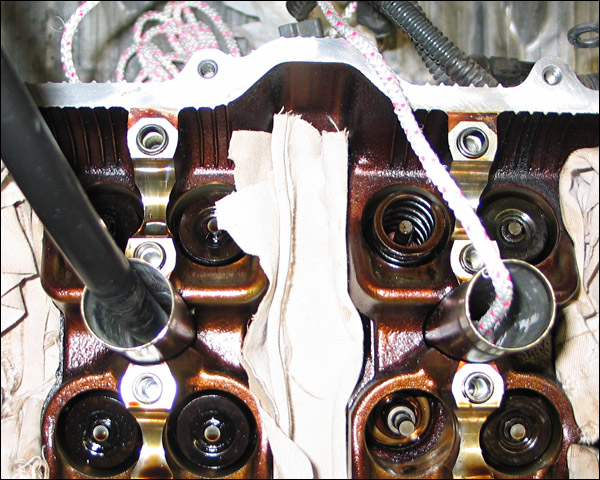
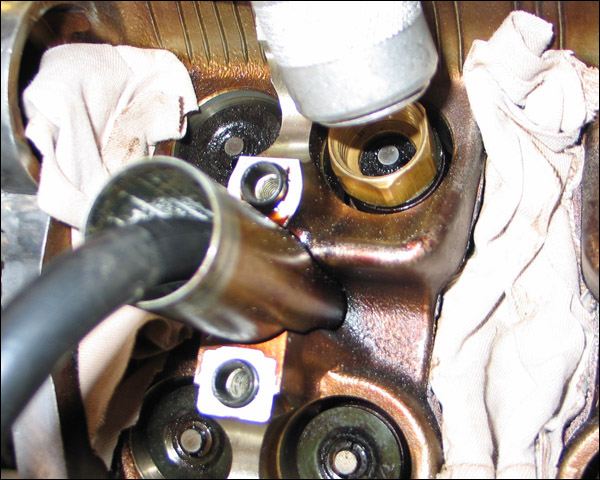
Here is an important step: cut lengths of rags so that you can plug up the passages in the cylinder heads. This is key because you will drop little parts every now and then. I actually just plugged up a couple of areas around the immediate valves I was working with and I had too many close calls. Just plug them all up!
I also put tape across the intake holes to make sure that nothing would fall into them as well. Dropping anything down these holes makes them impossible to recover without taking off the oilpan or you can order new ones.
To remove the valve spring retainers you need to apply just enough pressure to compress the springs for a split second. Once the pressure is taken off of the valves they are free to move on their own. The only place they will go is down into the cylinder and you will not be able to pull them back up if this happens. The object is to keep pressure on the valve so that it does not fall down into the cylinder while you are doing your work.
If you use the air pressure method you will be pressurizing the cylinders and you must have a good size air compressor to do this. I have a 30+ gallon compressor that supplies a lot of air. If you don’t have something that is capable with keeping up a good amount of air pressure once the air tank runs out then don’t try this. A portable roof nailing compressor is not a good idea! If your air compressor is really loud this will not be comfortable either, since it will be running to keep up with the air that will leak from the cylinders. I used the air method without any problems except I couldn’t hear my radio over the compressor :-\
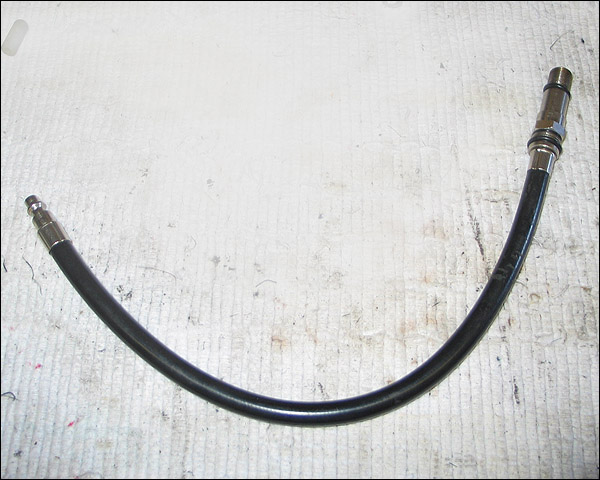
Here is a picture of the hose I used to go from the spark plug hole to my air line. Carquest part number #STL19700 is for a similar hose that anyone can order from them. I used 70-80lbs of air pressure with great results.
The other method which is very popular is to shove a slim rope down the spark plug hole which will physically fill up the cylinder and push against the valves if you rotate the crank to make it compress. This worked well but took a long time.
If you end up having to apply more pressure to a stubborn spring retainer (this will happen) then the valve will push into the cylinder just enough to ruin your attempt. Maybe you can figure out a way to hold the crank still that won’t slow down the job. I don’t consider installing the other spark plugs to hold the crank with compression time efficient. The rope trick takes longer.
So here I am pushing rope into the cylinder and turning the crank to compress the rope to hold the valves in place. The good thing about using the rope is peace of mind if you’re nervous and the absence of compressor noise is a bonus.
Putting the handle of my ratchet between the crank bolts for leverage worked great to turn it.
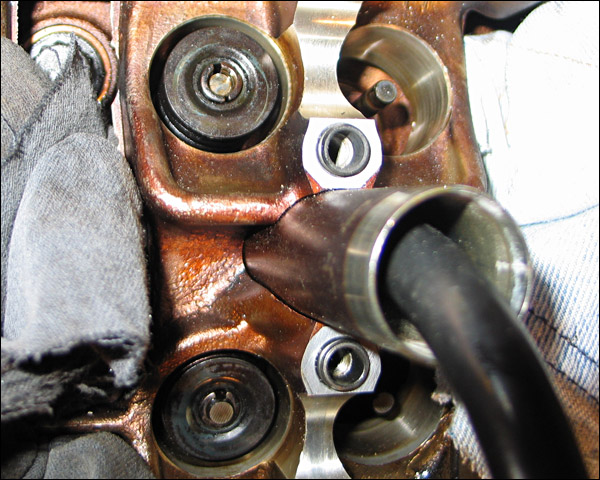
Now lets discuss that happens if you pop the valve spring keepers off. They are the little tiny things I mentioned earlier. They wedge in the tops of the spring retainers which direct them into the notches on the tops of the valve stems to hold them in place.
If the keepers pop out then the spring retainer will release their hold on the valve letting it move if not held by rope or air. Notice the cone shape the tiny keepers form when they come together in the hole of the spring retainer.
You want to pop out the small keepers, remove the valve spring retainer and the springs itself. Then the goal is changing out that old valve seal out and pressing in the new one. With the right technique you don’t even need to use a hammer to “pop” the keepers in as other instructions have suggested.
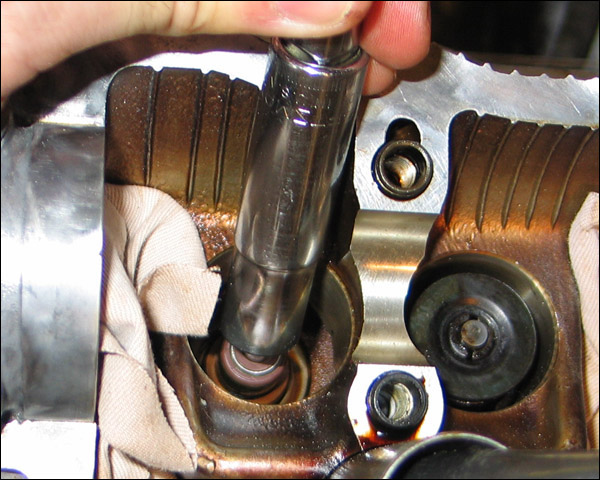
I highly recommend that you DON’T use a hammer at all, unless you really don’t have enough strength to press the valve springs. Further along I have a picture showing what position I used to easily compress the spring with the tool. Also notice the I.D. (inner diameter) of the new valve seal compared to the old, big difference.
Here is the most important tool in this whole operation. This is the keeper remover tool and I suggest you just order one from Carquest (or wherever) for the $40-$45 and you will be ready to go. I guess some people have made their own but this thing worked perfect and was ready to go right out of the package with no modification.
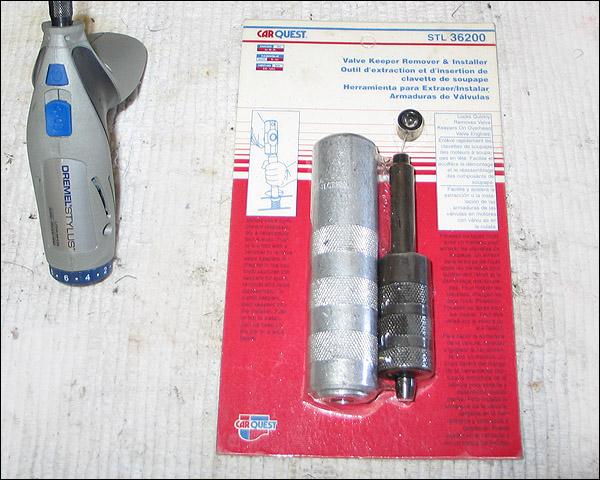
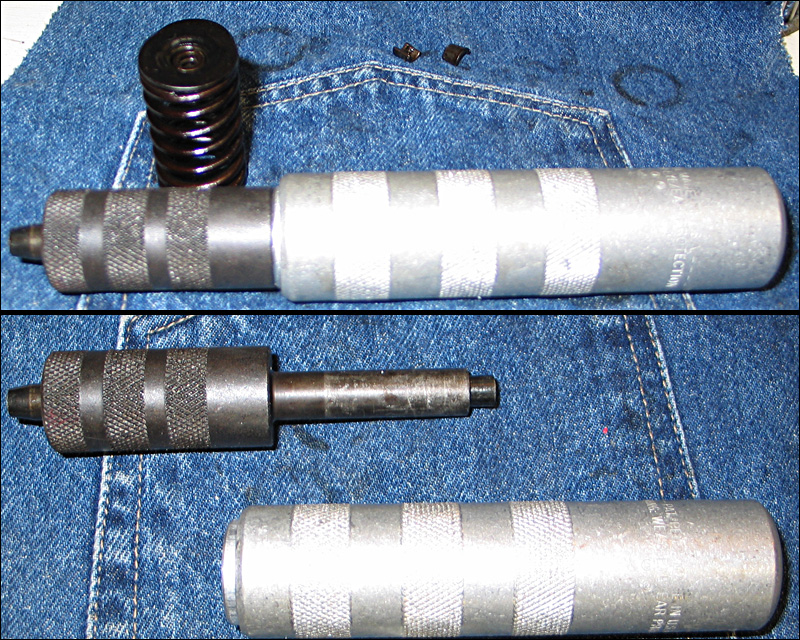
The silver part has a hollow end that is magnetized. This is what you press over the valve retainers which allow the keepers to be pulled out of the valve grooves by the magnets on this tool. Then once the seal is changed you put the black unit into the hollow end of the tool.
This is a spring loaded punch and it is sort of like an impact driver at this point because the tip will depress back into the tool when you press it down hard on a surface. When you “load” the keepers into the retainer and press it with this tool they will just pop back into place like magic. More on this in a bit.
In this picture you can see the keepers on top of the valve spring retainer on top of the valve spring. Then to the left you can see the groove in the end of the valve that the keepers fall into and are forced into place by the valve springs tension once properly placed back into the retainer.

Now take a look at the valve keeper removal tool (I’ll call it a punch for short). The magnetized end will not quite fit into the casting that surrounds the valve spring. It’s just a little fat so I used a brass fitting that is from a half inch plumbing coupler.
This little round piece is just the size to act as an extension and it’s not magnetic so it wasn’t annoying. Once the tool pushes down onto the retainer the keepers will be allowed to be pulled out by the magnets through the brass coupler just fine, never failed once.
Since you have the compressor supplying air to hold the valve against the valve seat the valve stem will not move when you are pressing the spring down since you are never pushing directly on the valve. If a valve does lose pressure it won’t just fall right down so don’t worry. The escaping air will make a lot of noise but just pull it back up and it will seal again.
When the keepers are let loose you should be able to hear them hit the magnet and you will know that you have them securely in the tool. Of course, grab a pair of pliers to remove them from inside the magnetized tool and set them aside preferable in a small cup or jar.
Here is a picture of me in position, pushing down to pop out a pair of keepers. Pulling back your arm and bracing for a good shove you can easily push the spring retainer down allowing the little guys to pop out. After you do this a couple time you should be able to pop them out really fast. I just have the engine on a stand on top of some wood blocks.
Here I put my left hand around the other side of the engine to hug it so it makes it easier to apply force. If I didn’t hold onto the engine it would wiggle and the slippage would be annoying and sloppy.
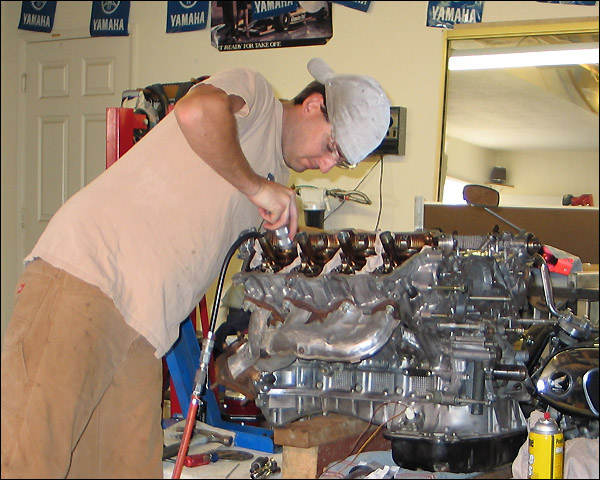
Don’t kid yourself, eye protection is a must with this kind of force and little parts.
Here is where you can now finally pull out your seals. I used some cheap pliers that come in a set of 3 for $10. I didn’t want to wait to order a special seal pulling pair of pliers. None of the tool trucks had them with them and I didn’t want to wait a couple more days when these work pretty good.
People have said that you might scratch the valve’s stem but I didn’t seem to have any problems with that. They pop out quite easily once you get a grip on them like I show here. Just make sure that you wipe off any crud from the valve before you put the new seals on.
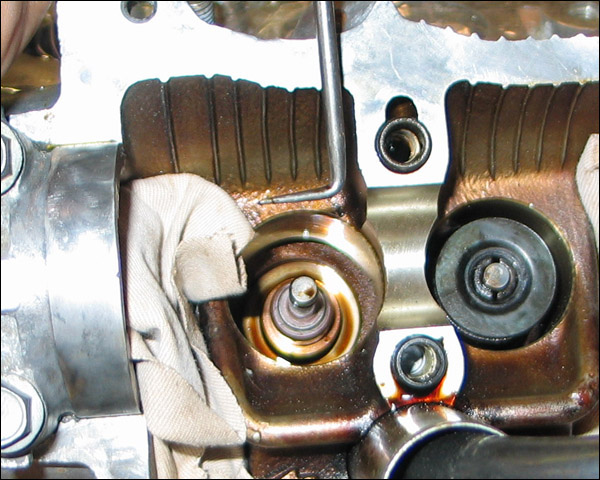
Here is a view of the punch with the keepers stuck to the magnets. Keep a pair of needle nose pliers close to grab them out nice and easy. DO NOT LOSE THEM. Be very careful! They don’t exactly have these at the hardware store and they can only be ordered FROM a Lexus dealership.
Now for the placement of seals. I dab a little oil to make them slide down easy. Then I push them down with a Craftsman 10mm deep socket. This seemed to work perfectly and I finished up with 2-3 short taps with a hammer to press them into place.
I used the end of a pick to gauge the gap left under the seal. It was just a tad more space under the seal than the width of the pick and I could use this to make sure the seal was pressed evenly in place all the way around each once. This left no question about how far down each seals was pressed and it is very quick.

Now get ready to put things back together. You might want to oil the pieces when you are putting them back together so that they slide back together when being pressed into place.
Place the spring and the retainer back in place and put the 2 keepers back into the retainer hole. They only go one way and they are tapered to match the hole so that they won’t fall through easily. The spring retainer won’t go down any further until you start applying pressure.
Place the punch directly in alignment with the valve and make sure to keep it in alignment while you are pressing down on it. If you don’t press nice and straight you run a very high risk of the keepers not falling in at all. If you keep it straight and press nice and firmly you will be surprised at how easy it happens.

This happens very quick and all within the one good push that you give to the tool.
When you press the punch the tip will keep push the keepers in the hole and they will spread around the end of the valve due to the way that they are shaped. So once the valve spring retainer pushes the spring and passes the notch on the valve stem, the keepers will be forced into place around the valve by the force of the spring inside the punch tool.
Above all just be careful because if you don’t keep things in alignment and something hangs up in this motion, be careful while pulling the punch back. Maybe only one of the keepers fell into place or both of them might be out of place. If you pull back quick the spring might still have tension on it and eject them.
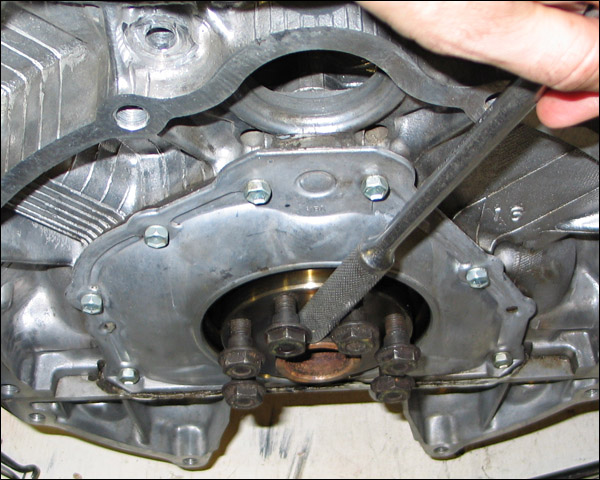
I must admit I did drop a keeper when I was positioning it. That is your worst fear since when it falls through the head and down the oil passage the only way to get it back is through the oil pan. I ended up taking off the pan looking for mine but I never found it! I was about to order a new one over the phone but I knew it just didn’t disappear into thin air so it was my mission to find it. Long story short I found it eventually but it hiding just out of sight inside the top of the head.
My eyes were playing tricks on me as I could have swore I dropped it down the oil passage. The good thing that came out of it was I got to inspect my oil pan for contaminants and apply a new seal on it as well and I can sleep soundly knowing I had finally found it. Here is where it was hiding:
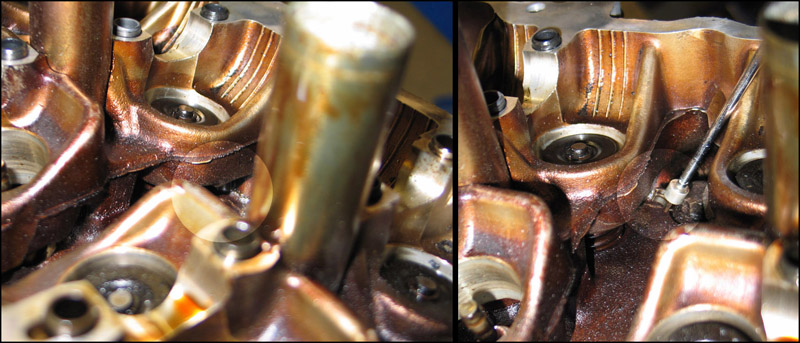
Here is where you’re going to be looking if you drop any tiny pieces down into that cylinder head!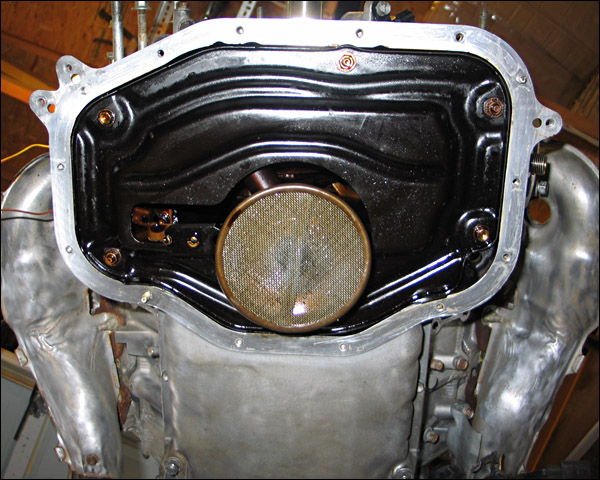
So there you have it. Just keep an eye on things as you take them apart and you’ll be fine. Concentrate and get a good rhythm going and you should be able to get all 32 valve seals changed out fairly quickly. Here are a couple more close ups for reference.
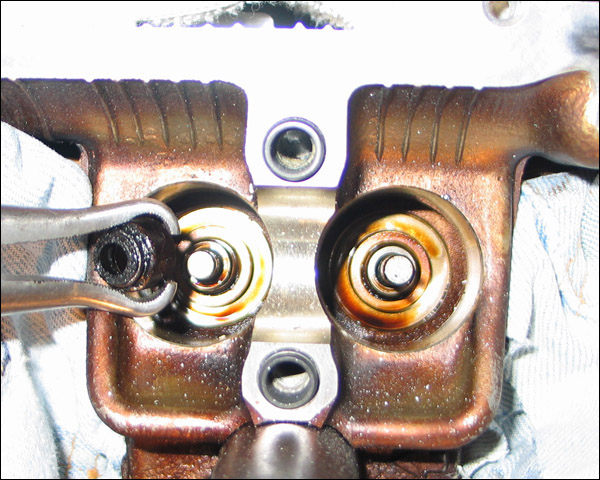
Below is a picture of upper valve keepers that weren’t pressed on hard enough to fully seat them in the spring retainer. If you pull back the punch and see the keepers like this remember that they have spring tension on them and they could slip and shoot out since they aren’t seated correctly!
Pop the black part out of the punch tool and put the removal tool right back on in position and push it to release the keepers right out again for another try. The lower one was pressed in just fine.
Here is a breakdown on the bench: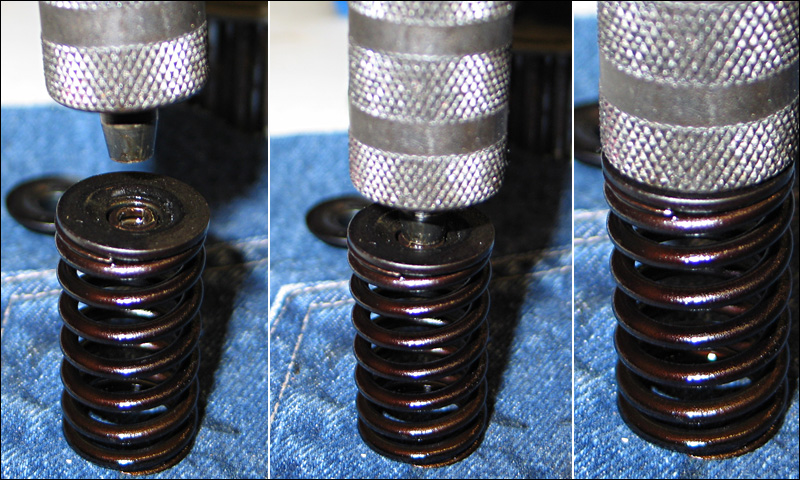
Once again as shown below you want to load the keepers into the hole of the retainer and place it on top of the valve spring. Then you want to look very closely to see if the keepers are lined up perfectly with the valve stem. If you look down the hole between the keepers and the stem is not aligned very closely don’t even bother. Align it perfectly and then place the punch tip right in the middle of the keepers, hug the engine and press it down with a good shove.
The action should be smooth and the spring will compress under the pressure nice and smooth and you will hear the keepers fall in place with a “click”. It will feel weird the first couple of valves but you will pick it up quickly and after two cylinders you should be a pro at it.
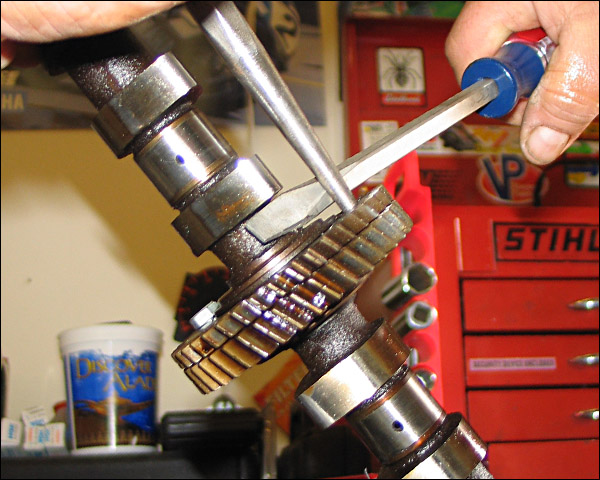
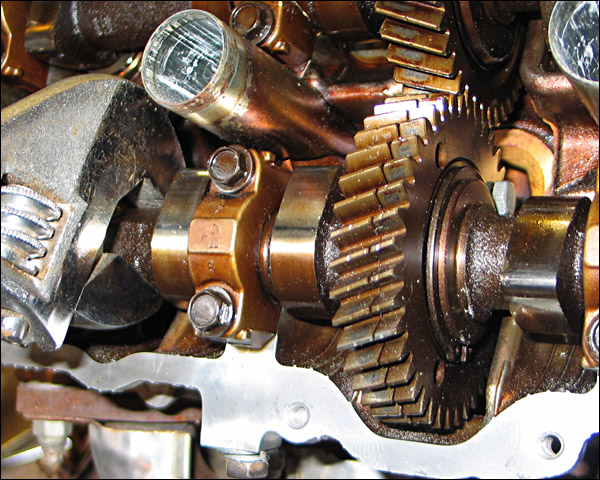
For all the first timers when putting the camshaft back don’t forget to pre-load the cam gears. Refer to the Lexus manual for the simple process. I just hold them in a vise and use a punch and screwdriver to leverage the gear as shown. Then I use my second set of arms to insert a bolt which holds the gears in place temporarily as it is installed.
Make sure to torque down the caps in the correct order as you should gradually increase the torque as you go around the caps a couple of times. Below you can see my crescent wrench holding the camshaft getting ready to remove the retaining bolt that will release the cam gears. Notice the holes and the bolt on the side of the cam gear. Nice and easy.
Good luck and make sure and put every valve spring and bucket back in the same hole you took them out of. Taking pictures with a digital camera might also be a good idea before you tear things apart to get to the valves.
I hope this article has helped you with changing out the valve seals on your Toyota or Lexus without taking off the heads!
Article by Ryan Smith (Smitherz)
Related links:
How to adjust 1uzfe valve clearance
How to remove and install cams
Thank you so much for the info. it has help me change my valve seals on an IS200 using a string.