remains. If you own a 1UZ from 1990-1997, you
for help with ordering or questions. This will probably be the last kits I have made.
All other parts are SOLD OUT and won't return, including the LS400 and SC400 turbo kit, rebuild kits, supercharger and performace torque converter. We're not an auto parts supplier and I can't respond to inquries for random Lexus and Toyota auto parts.
Normally smooth running Lexus LS400 engine suddenly developed a rough idle and quite often had a hesitation or miss when pulling away from a stop at partial throttle. The car has 100K miles and the maintenance records indicated that new sparkplugs had been installed around 85K miles.
I am the second owner, I purchased the car with 99K miles showing on the odometer. Since the plugs were fairly new, I decided to check out the fuel delivery system first, if the problem persisted, I was going to look at the ignition system.
It is commonly known that a build up of crud inside the throttle body can cause the symptoms I was experiencing with the LS and a malfunctioning fuel injector was another possibility. I decided to work both possibilities at the same time. I purchased a can of BG 44K from a local foreign auto dealership for $16 and I put that into the fuel tank that was ¾ full.
Then, without running the engine, I cleaned the throttle body twice, the first time with a generic choke and carb cleaner that I felt did not do a good job and a second time using Valvoline SynPower carb, choke, and throttle body cleaner. After cleaning the throttle bore as outlined in the following slides, the engine immediately returned to it’s normal, smooth idle and I had to look at the tach to tell if the engine was running.
READ BEFORE YOU START
The Lexus shop manual instructs you to remove the battery negative lead and to wait 90 seconds before commencing work to remove the components connected to the throttle body.
Since you will be spraying a very highly flammable liquid in the throttle body, to avoid any potential source of an electrical spark, it would be a good idea to comply with the Lexus instructions.
Be warned that disconnecting the battery negative lead will cause you to lose all presets in your radio as well as the memorized settings for the seats and outside mirrors. Follow the instructions supplied with the throttle bore cleaner. Be safe and use common sense when working on your auto.
I am providing these procedures to be used by competent, mechanically inclined individuals free of charge and I assume no responsibility for damage to your auto or for injuries that might occur as a result of anyone using these procedures.
|
|
 |
|
|
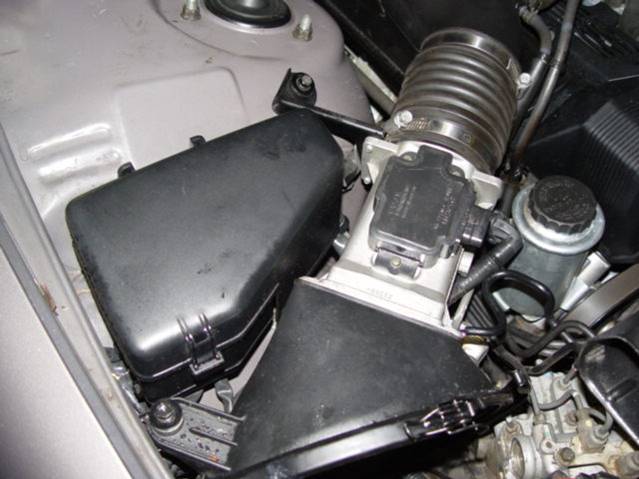
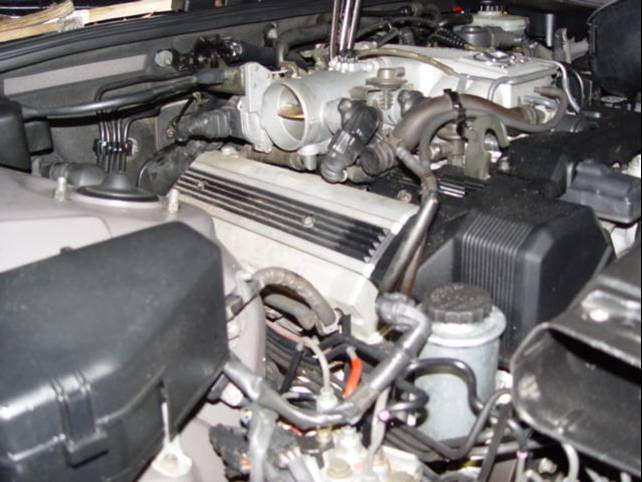
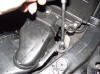
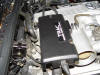
| After disconnecting the battery negative cable and waiting 90 seconds before starting work, remove bolt securing air intake filter housing with a 10MM socket. A ¼ inch drive socket, an extension and a 10MM socket are the only tools required to accomplish the throttle body cleaning. |
|
|
|
|
|
 |
|
|
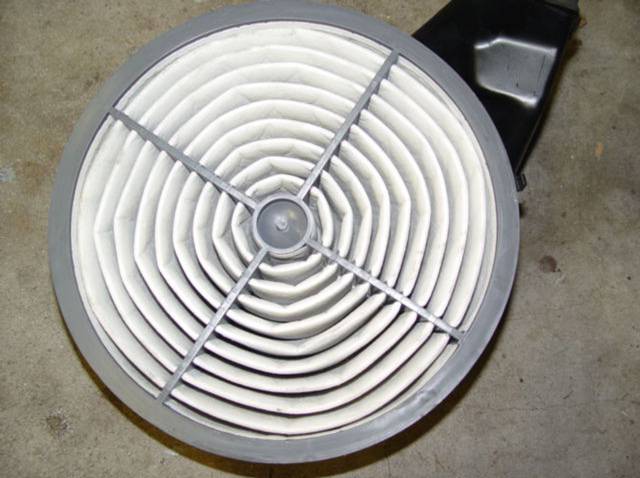
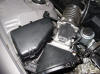
| Air filter removed. This is a good time to inspect the air filter and replace if it is in bad shape. If the filter is not too dirty, you might be able to help it some by using an air hose connected to a shop air compressor to blow through the air filter in the reverse direction of normal air flow . If you can’t clean the filter, replace it. It makes no sense to go through a throttle body cleaning and then reinstall a clogged air filter. |
|
|
|
|
|
 |
|
|
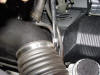
| Loosen the hose clamp connecting the flexible rubber section of the mass airflow sensor assembly to the plastic air intake body. My hose clamp had a painted scribe mark on the clamp marking the position of the loose end of the clamp. If your clamp is not similarly marked, use a Sharpie and mark the clamp as shown. You will use this mark when reinstalling the mass airflow sensor assembly to prevent over tightening of the hose clamp. |
|
|
|
|
|
 |
|
|
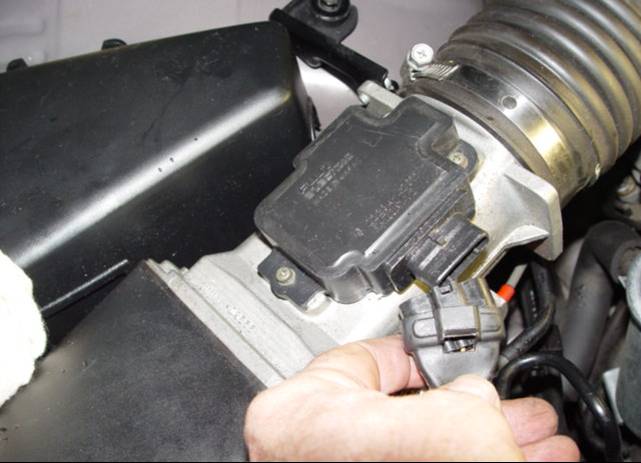
| Remove the electrical connector to the mass airflow sensor . Depress the release tab while tugging on the connector itself. Do not pull on the wiring of the connector to prevent wire breakage. |
|
|
|
|
|
 |
|
|
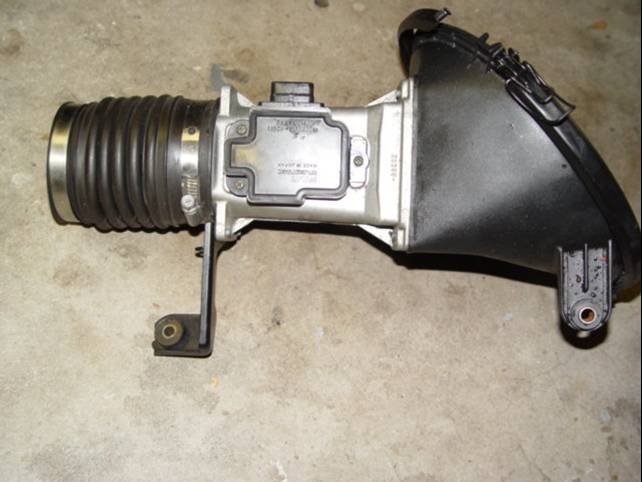
| Remove the two indicated 10MM bolts that secure the mass airflow sensor assembly to the fender apron. Threat the mass airflow sensor assembly with the care that you would give a precision optical instrument, which it is . The mass airflow sensor assembly is very expensive to replace and is a critical component of the air induction system. |
|
|
|
|
|
 |
|
|
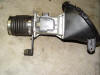
| Remove the mass airflow sensor assembly and set aside. Protect from damage while removed from the car. |
|
|
|
|
|
 |
|
|
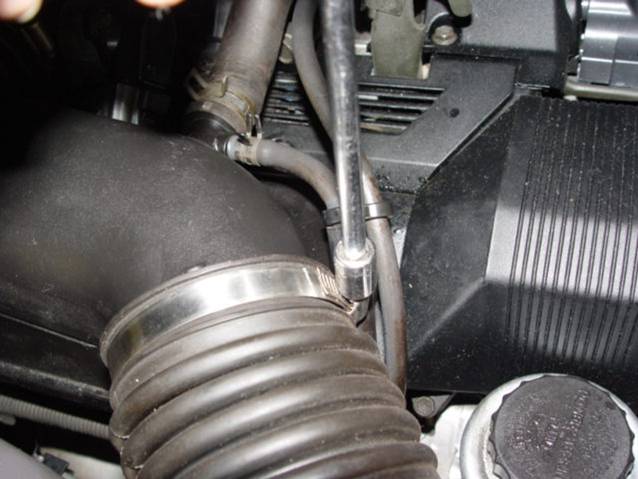
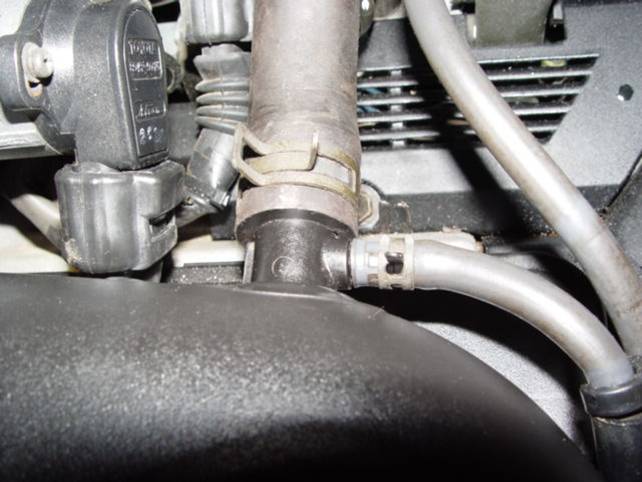
| Remove the two hoses from the air intake body. Slide the hose clamps back from the hose nipples and then work the hoses off. I was able to slide the clamps using finger pressure on the clamp tabs. |
|
|
|
|
|
 |
|
|
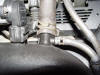
| Loosen the hose clamp securing the plastic air intake rubber gasket to the throttle body. Just loosen, it is not necessary to remove the clamp. Once again, if the hose clamp does not have a scribe mark at the loose end of the clamp, use a Sharpie to mark the clamp for proper tightening on reassembly after cleaning. |
|
|
|
|
|
 |
|
|
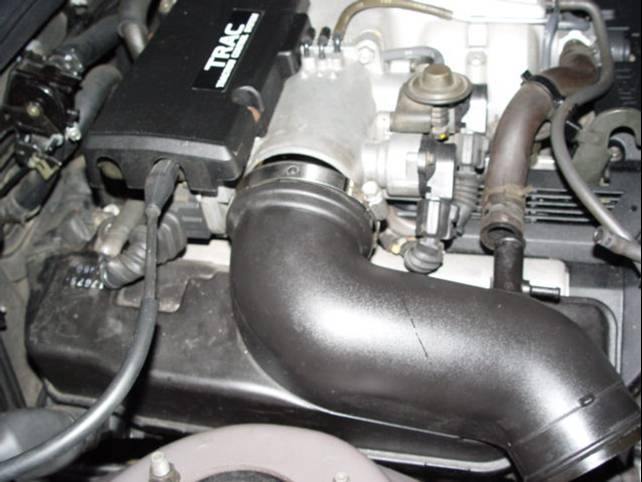
| Remove 10MM bolt from the upper, left corner of the plastic air intake. There is only one bolt securing the air intake to the engine. |
|
|
|
|
|
 |
|
|
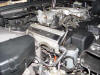
| Plastic air intake loosened and ready for removal. The rubber gasket between the air intake and the throttle body has a rather tight grip on the throttle body. It will come loose by pulling firmly on the air intake while working the air intake back and forth on the ends. |
|
|
|
|
|
 |
|
|
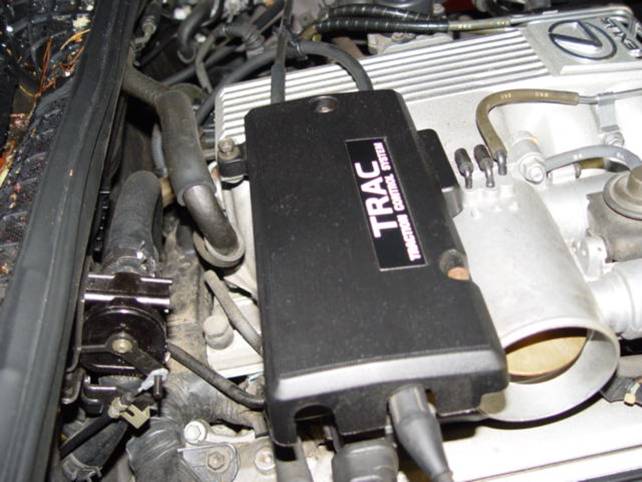
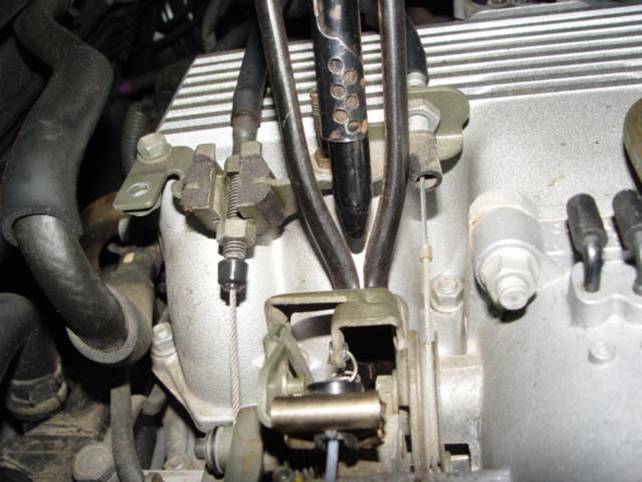
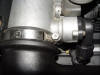
| Loosen the two 10MM bolts securing the cover of the throttle body linkage. These bolts are captive to the cover, loosen sufficiently to remove the plastic cover. |
|
|
|
|
|
 |
|
|
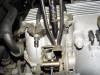
| Everything removed and ready to start the cleaning job. WARNING!!!!!!! DO NOT FORGET TO REMOVE WHATEVER YOU USE TO HOLD THE THROTTLE OPEN AFTER CLEANING TO PREVENT A WIDE OPEN THROTTLE START. USE SOME COMMON SENSE HERE |
|
|
|
|
|
 |
|
|
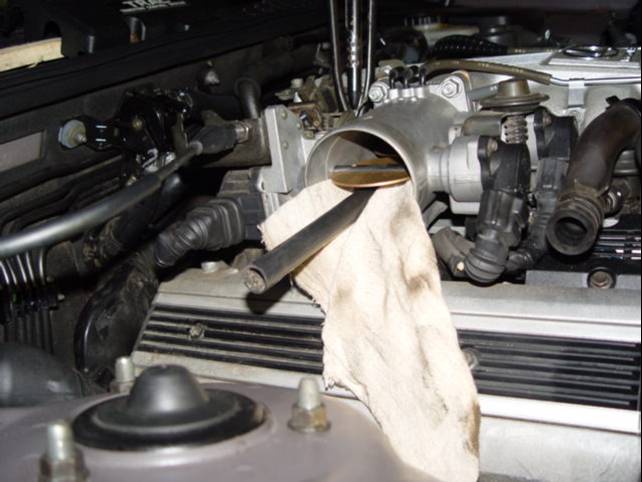
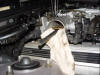
| There are two throttle plates in the throttle body. The near plate is spring loaded open while the aft throttle plate is spring loaded closed. Here I have manually opened the aft throttle plate and put a pliers behind the linkage to jam the throttle plate open to facilitate cleaning. |
|
|
|
|
|
 |
|
|
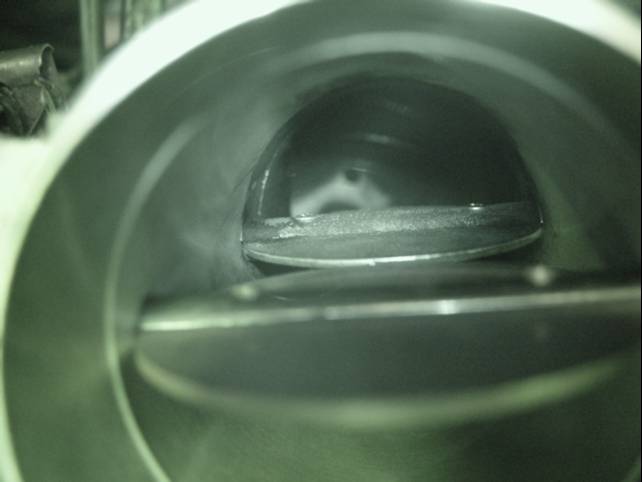
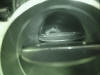
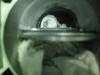
| Night vision picture down the throttle bore. This picture was taken after the first cleaning with the generic carb cleaner and a toothbrush. You can still see some of the oily grime built up on the top of the aft throttle plate. The generic carb cleaner did not loosen the oily grime very much and overall did a poor job. The build up was quite heavy, I would estimate between 1/16” to 1/8” thick. |
|
|
|
|
|
 |
|
|
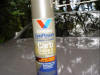
| Valvoline advertised that their SynPower carb, choke and throttle body cleaner would dissolve the oily grime build up on a throttle body so I decided to try it. I wasn’t disappointed, it only cost $1.98 at the Advanced Auto Parts store. It has a plastic discharge tube that handily swivels in all directions. I highly recommend the SynPower, it worked as advertised. |
|
|
|
|
|
 |
|
|
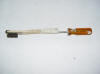
| Even though the discharge tube was fairly tight in the swivel, I insured that the tube wouldn’t be blasted into the intake manifold during cleaning by wrapping some masking tape around the tube and swivel assembly. I also bent the tip as shown to be able to more efficiently spray the cleaner on the aft throttle plate and the throttle body bore. I heated the tip of the tube in running hot water and then bent the tip and held it until it cooled. |
|
|
|
|
|
 |
|
|
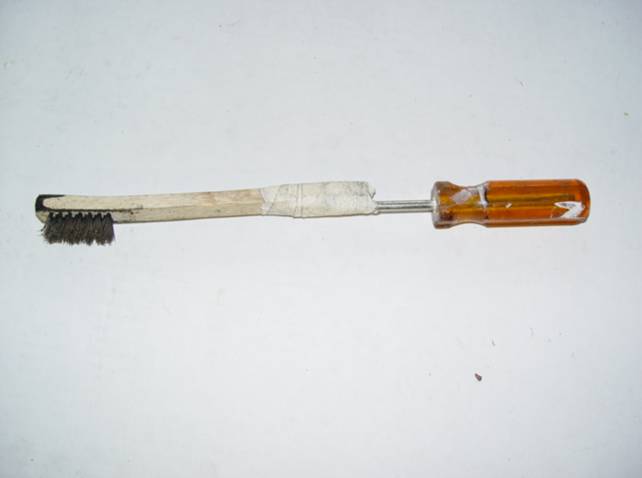
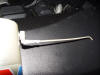
| A kluged up scrub brush. This is a fairly stiff bristle brush (non-metallic) that was a little short handled to reach the backside of the throttle body. This kluge worked rather well for scrubbing the aft throttle plate and the throttle bore. SynPower recommended just wiping down with a rag after spraying, this brush worked well for me to get most of the buildup loosened up. I then wiped down the bore with a rag after scrubbing. Do not use a wire brush in the throttle bore or use any material that will scratch the soft metallic surfaces in the throttle bore. |
|
|
|
|
|
 |
|
|
| Here I am using a piece of scrap plastic pipe to feed a rag down the throttle bore to soak up the goop that will run off the throttle plate and the throttle bore. Once again, do not insert anything into the throttle bore that will scratch the soft metallic surfaces inside the throttle bore. I feel that inserting a shop rag in the bore during cleaning is an important step, without it you will be forcing a lot of gunk down the intake manifold to perhaps be ingested by the engine. |
|
|
|
|
|
 |
|
|
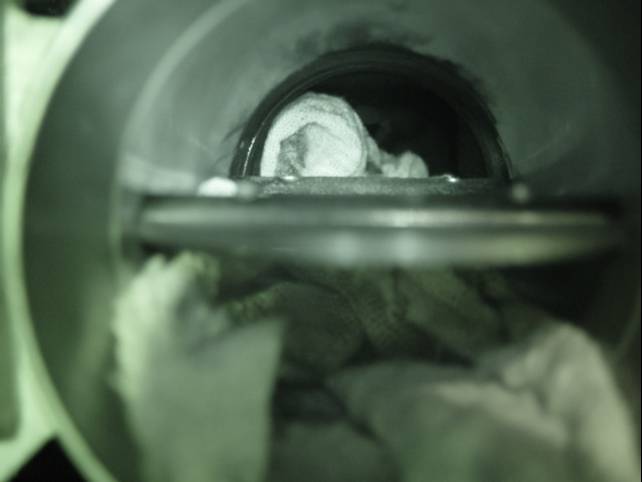
| Rags stuffed into the throttle bore and ready to start spraying the SynPower cleaner. You can see some of the crud in the rear part of the throttle body bore. Nasty stuff. |
|
|
|
|
|
 |
|
|
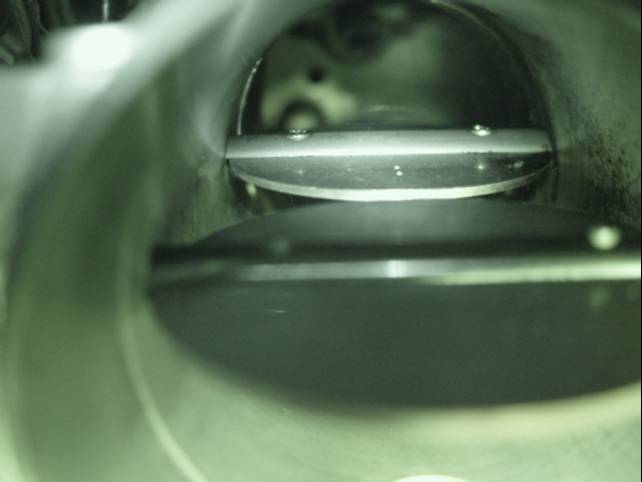
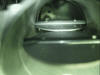
| It is difficult to get a good picture at the rear of the throttle bore due to bad lighting. This is a night vision shot after cleaning most of the crud out. The oily streaks on the aft right side of the bore were easily removed with a rag soaked with the cleaner. The aft throttle plate was as clean and shiny as the front plate after cleaning, the Valvoline SynPower really did a good job. |
|
|
|
|
|
 |
|
|
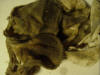
| Here are some of the rags that I used to clean up inside the throttle bore to give you an idea of how much crud was inside the throttle body. I had one other rag, not shown, that was just about as dirty, There was an amazing amount of crud inside the throttle body after 100K miles. The original owner of this auto used conventional motor oil, I wonder what the throttle body would have looked like if Mobil 1 or another synthetic oil had been used. |
|
|
|
|
|
 |
|
|
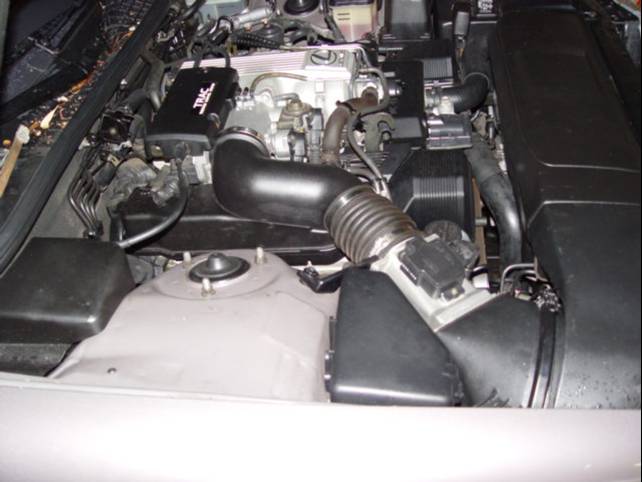
| ALL BACK TOGETHER AND READY FOR A ROAD TEST |
|
|
|
|
|
|
|

FINISHING UP THE JOB
After cleaning the throttle bore, I used an air hose and nozzle from my shop air compressor to clear all the fumes from the intake manifold that I could. The cleaning fluid is extremely flammable and I didn’t want to take any chances of an intake manifold backfire during start. This probably isn’t necessary but why take a chance?
After cleaning, reinstall all removed components in the reverse order of removal.
WARNING!!!!!!!!!!!!! Make sure you have removed whatever device you used to jam the aft throttle plate open. Tighten the hose clamps on the air intake and mass airflow sensor so the loose end of the clamp reaches the scribe mark, do not over tighten.
Connect the electrical connector to the mass airflow sensor. Make sure that the two hoses are connected to the air intake and that all removed bolts are reinstalled. Reconnect the battery negative lead and you are in business, ready for a test run.