Over the past 3 years or so I have wired over 20 Lexus V8 transplants into a variety of things, with a plan of using one in my 1934 ‘Ford’ Woodie Project. Given the ever increasing timeframe of the Woodie project, I figured it was time I did a ‘quick and dirty’ conversion of my own. This came about for a number of reasons:
- I was getting tired of being hassled for not having one of my own.
- I needed to actually complete a project – having had three projects die in recent years I was beginning to feel like all my projects went nowhere.
- My daily Driver 4WD turbo GT4 Celica despite being a huge amount of fun was going to need significant TLC and $$$ to keep it going.
- A better tow car would be handy.
- Because I could.
I seriously considered a van or a ute from a load carrying etc perspective, but decided against them due to:
- Initial vehicle cost compared to other body options.
- Poor comfort compared to a car (I was driving over 500 km a week to and from work).
- Poor handling compared to a car.
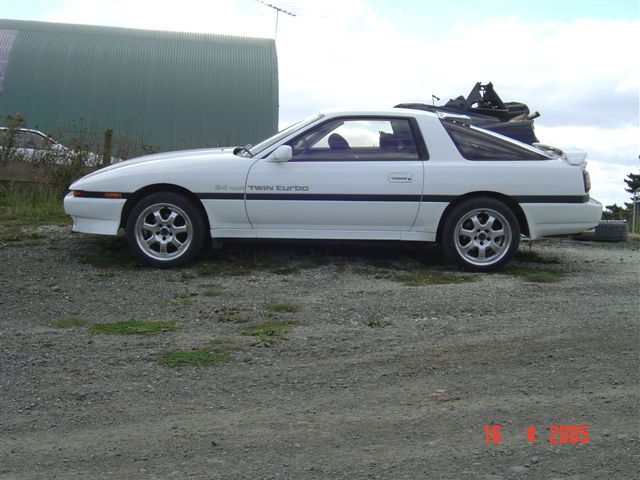
For the past few years I have been eyeing up 70-series Supras (1986-1992) as a donor for the Woodie suspension, gearbox etc. Consequently I had been buying dead ones and stripping them for the bits I needed, along the way discovering the subtle variances in hardware between the various models.
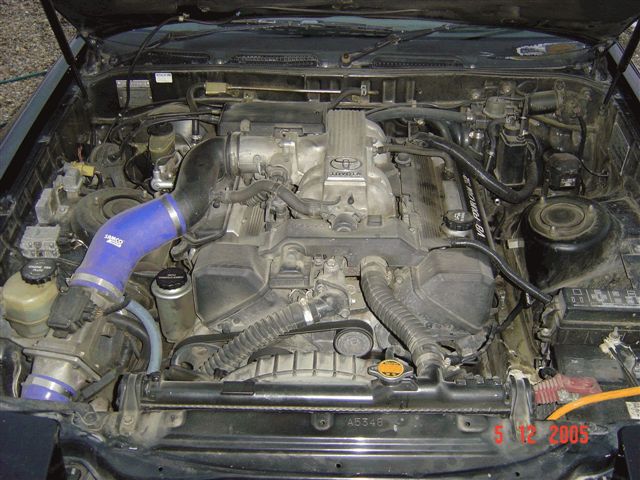
A couple of years back I happened to have a rolling Supra shell (less engine and gearbox), Lexus V8 and a portable engine crane in the garage all at the same time (as you do).
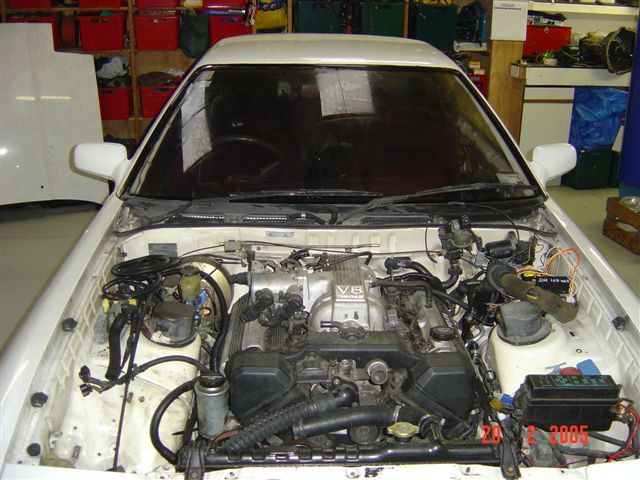
One thing led to another and 30 minutes later I had the V8 sitting in the engine bay. Much to my surprise it fitted in really nicely and looked like a conversion would not be too difficult.
I thought nothing more of it until about 18 months ago when it became apparent that I would really need to do something about a new daily driver in the near future.
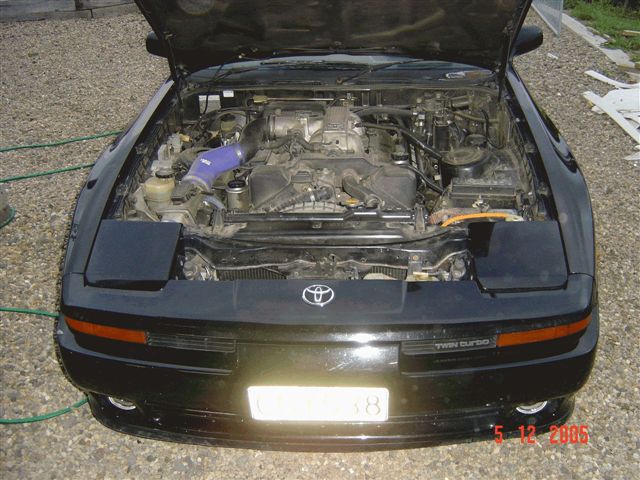
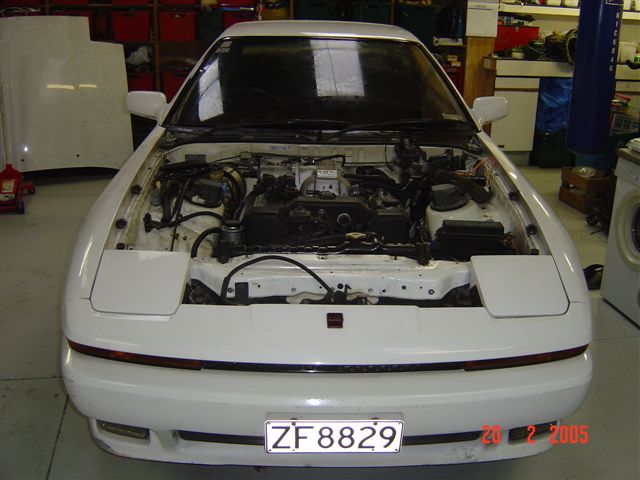
So, last year I ended up with converting both a 1990 Supra for myself and a 1986 one for a friend. Mine is a 5 speed facelift wide body; his is an early model stock body Auto. It is really interesting comparing the two finished cars – but first things first.
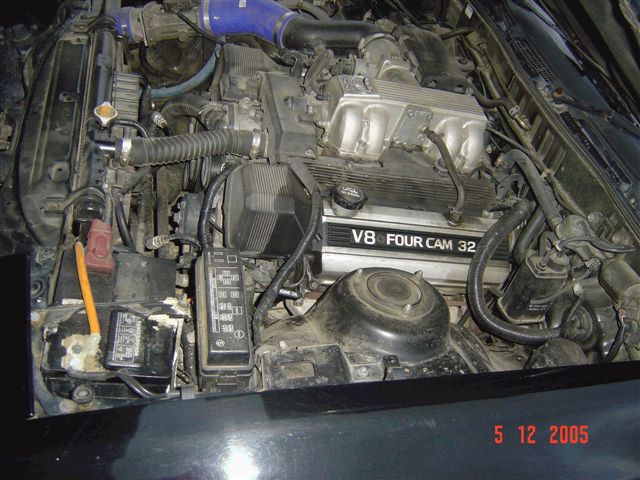
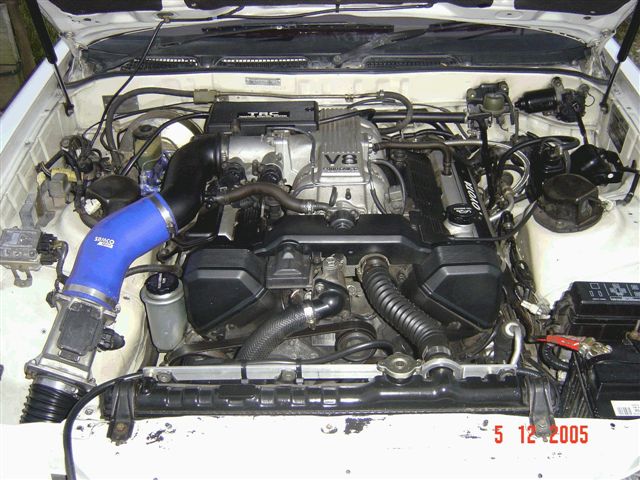
Engine
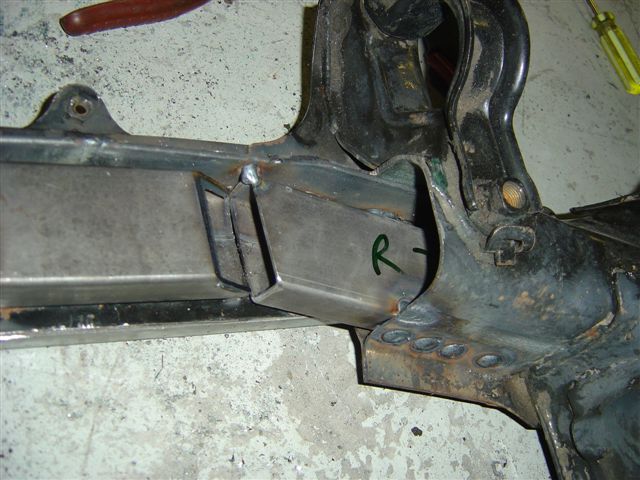
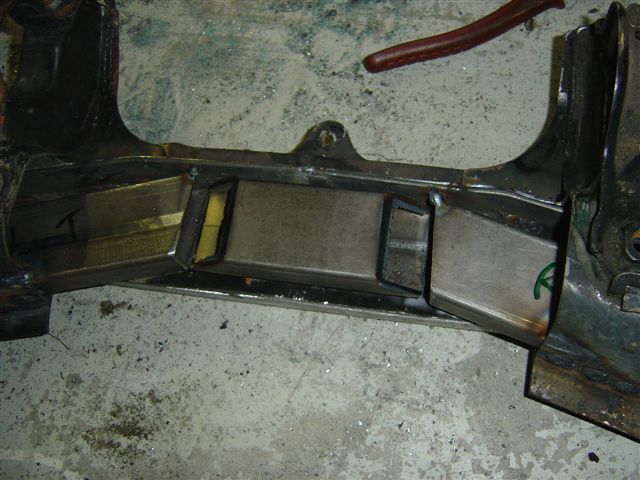
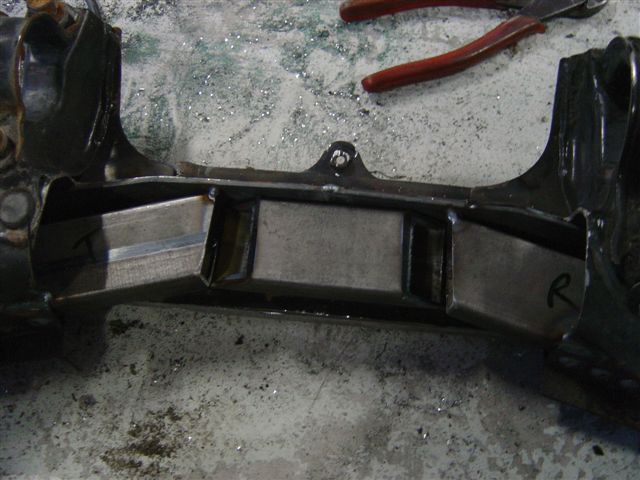
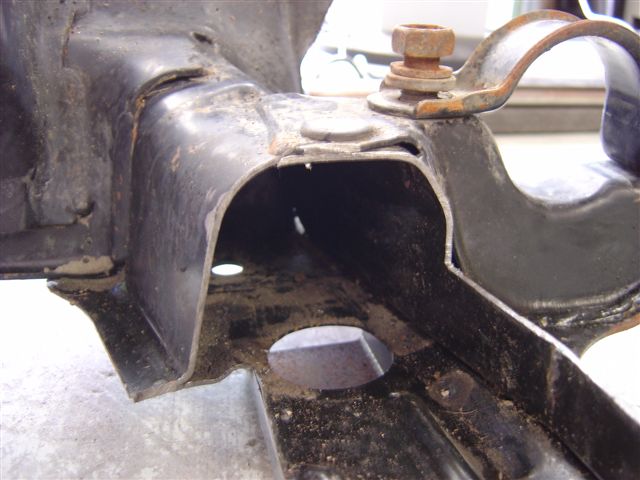
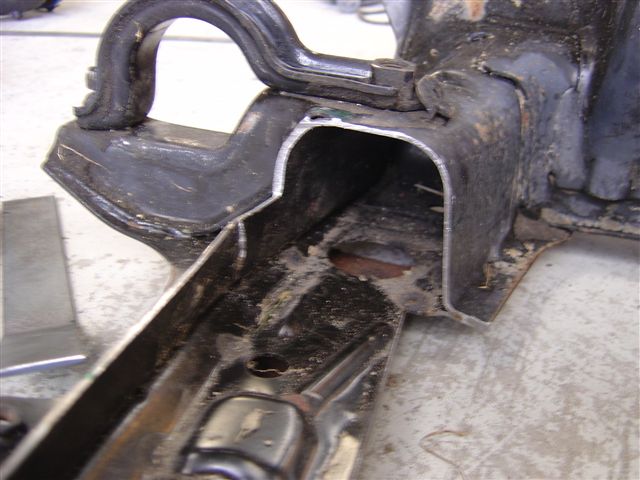
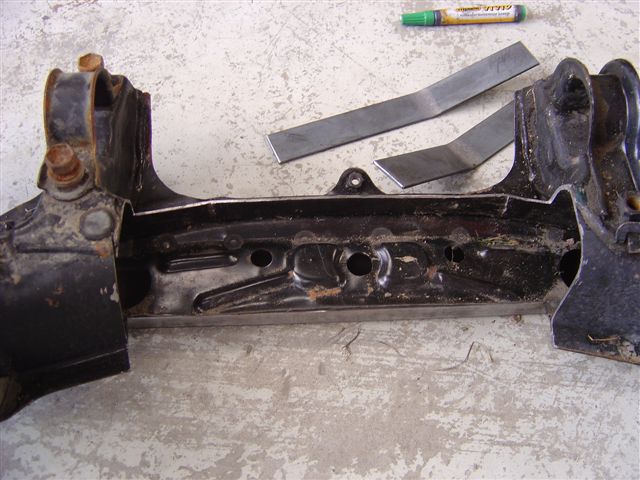
Best engine (but also the rarest it appears) to use is from a Soarer. This is because it has a rear sump, which clears the front cross member. Some minor trimming needs to be done on the engine mounts on the subframe to allow the sump to fit past on installation – ultimately you effectively widen the gap between them by ~20mm.
The ironic aspect is that the sump clears fine once in place (the engine is narrower where the mounts are located), it is simply a fact of there not being enough width to allow the sump to fit past while the engine is lowered.
I bolted the engine to the factory W58 Supra 5 speed using one of my adapter plates, a lightened billet flywheel and 2100 lb clamp clutch assembly. The gearbox remained on its factory rear mount and retained its driveshaft.
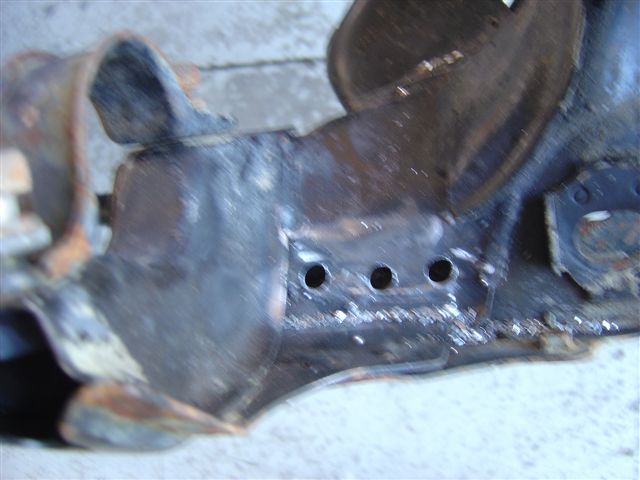
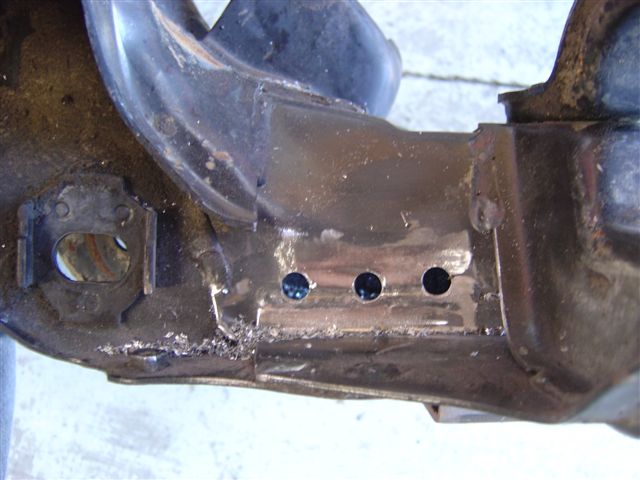
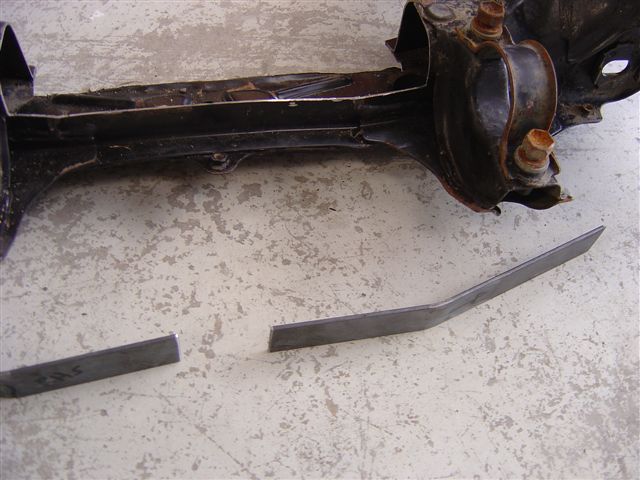
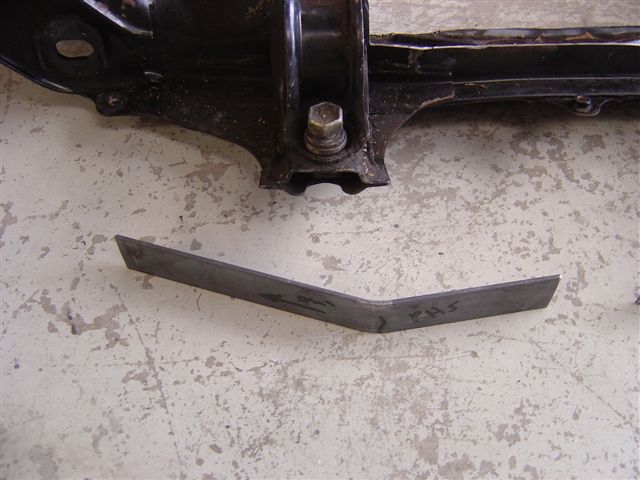
I sat the motor on the subframe via a ~20mm thick piece of wood and fabricated engine mounts to suit, ensuring the engine was level and centred in the engine bay. This resulted in the engine mounts being exact mirror images of each other.
I also mounted an external slave cylinder on the same side of the V8 bellhousing as had been in the car, which meant the standard plumbing mated up.
Brakes
The factory brake booster was too large a diameter to clear the rear portion of the right hand cylinder head cam cover. Fortunately the large size of the booster is in part due to it having to act as a vacuum reservoir for period when the turbo engine is on boost.
It turns out that a standard Hilux booster turned upside down has identical mounting points and clears the engine.
A critical step is ensuring the new booster has identical pushrod lengths to the old one (otherwise the brakes won’t work correctly). This is achieved by measuring the original booster pushrod dimensions and adjusting the new booster to suit. The factory brake master cylinder was retained, with the net result being a slightly heavier (but still very acceptable) brake pedal.
Despite the engine being significantly lighter than the 6 cylinder it replaced the brake balance remains fine. Note that the 2 litre turbo cars have ~270mm front discs, whereas the 2.5 and some later 3 litre turbos have 305mm.
I suspect the export 3 litre early models also had the bigger discs, but the Japanese domestic did not. Rear discs are the same on all models.
Exhaust
The V8 is a close fit in the engine bay, hence we used standard mid sump ‘crown’ headers. These are very poor from a flow perspective, but definitely compact. The left hand unit dump pipe had to be shortened slightly to clear the firewall but they otherwise fit well with factory heat shielding being able to be retained.
From the headers we fitted a 2½” system with an 18” resonator located roughly under each front seat (there is a suitable recess in the floor pan on each side) before merging into a singe 3” pipe, with a final muffler under the boot floor.
If you do not have access to a crown exhaust manifold the standard ones can be shortened to fit. Extractors would be better but need huge effort to make given the tight space to work in.
Cooling System
In both cars the factory radiators were retained. My car was a 1JZGTE 2.5 litre twin turbo; Jason’s was a 1GGTE 2 litre twin turbo. The radiators appear identical and easily cope with the cooling load. I run the factory variable speed computer controlled hydraulic fan, using the 1UZFE on engine components and ECU, with the 1JZGTE fan, reservoir and fluid cooling system.
Jason has 2 x electric fans mounted behind the radiator. Aftermarket flexible hoses were used, with a slight complication arising from the radiator and engine fittings being different diameters. New hoses and tight hose clamps resolved the issue!
Power Steering
The factory power steering in both cars was retained, effectively by splicing the V8 power steer pump into the car system with new hydraulic hoses. My car has variable assist speed sensing steering, which works flawlessly.
Both cars utilise the cooling loop in the bottom of the radiator originally intended for automatic trans cooling. My car was converted to 5 speed during the engine swap, whilst Jason installed a HD aftermarket trans cooler.
Oil Filter
Jason actually used a mid sump crown engine, which supplied the correct gearbox, headers and (lack of) hydraulic cooling fan system, but the sump location required significant cross member and oil pan surgery – use a rear sump if at all possible.
His engine choice resulted in the oil filter being located towards the rear on the left side of the engine block. This is accessible from under the car, but it is tight.
My car has the factory front mount, which is great for access, however, it interfered with the sway bar. Ironically the bend in the sway bar to clear the original engine sump posed the problem.
I modified a rear oil filter mount from a Crown to fit, however, the fuel lines from both the car and my engine were in a similar location and ultimately the front mount filter was a better solution than trying to re-route the fuel lines. I had a sway bar custom made without the kink. This cost $300 and clears the oil filter fine.
Fuel System
The rear sump engine has fuel supply and return low on the LHS of the engine block towards the rear. This lines up very well with the factory car lines but leaves little room for hands to get in to access a rear mounted oil filter as detailed above, especially with the clutch slave cylinder ending up in the same vicinity.
Jason’s mid sump engine has fuel supply and return on top of the engine, which were reached by extending the flexible hoses, thus leaving room below to access the oil filter from under the car.
I would still prefer to use the rear sump engine given the easier and neater fuel and oil filter access, and accept the cost of a custom sway bar. The factory fuel pumps are more than adequate.
Air Conditioning
Jason retained the factory aircon, effectively splicing the V8 compressor into the original system. The system has yet to be final plumbed and charged, but there is no reason to expect the climate control system would not work.
Heater
The heater was successfully connected using a common ‘hockey stick’ shaped hose (I think from a Holden) cut to length and a modified factory hose.
Automatic Transmission
Jason’s car uses a standard Crown transmission however he swapped the tail housing for the Supra unit. This provided him with a speedo drive on the correct side. Whilst the back of the trans was off he also changed the driven gear to suit the final diff ratio so the speedo remained accurate. The trans bolted straight up and the stock driveshaft fit. The entire Supra shifter assembly was used to shift the Crown trans.
The trans dipstick became a challenge to bend to clear the firewall, especially with the fuel lines in the way. If I did it again I would investigate the viability of swapping the Supra trans oil pan (and dipstick tube) onto the Crown trans to see if it cleared any better.
Note you should use a Crown trans as it has a standard yoke. A Lexus trans (with a rubber donut output) will require a custom driveshaft and possibly a modified gearbox mount. We also used a SC/LS400 ‘U1′ bellhousing as opposed to the Crown ‘U2′; this enabled the engine and trans to both be upright as opposed to having them skewed ~7 degrees to each other.
Differential
Being originally a 2 litre, Jason’s car came fitted with a 4.55 ratio open diff. This was swapped for a 3.9 ratio 4 spider LSD. Given that my car was originally a 2.5 litre twin turbo it came with the rare 3.9 ratio Torsen LSD. Generally 2.5 and 3 litre Supras have a 3.9 ratio diff, with some 3 litres running a 3.7.
In hindsight a 3.7 might be a better ratio (they are relatively rare) as the V8 easily has the torque to pull a taller final drive ratio. Then again, the acceleration wouldn’t be quite so good…
Note the manual and auto cars tend to run the same diff ratio for a given engine. In theory Jason’s Supra is running the exact same overall gearing as the Crown sedan (it has identical tyre size), however, the Supra is ~200kg lighter hence the ability to run a taller diff. The V8 trans also has (I believe) a .70 top gear, whereas my W58 has a 0.78, which results in my car pulling slightly higher revs in 5th.
Suspension
Both car’s suspension was left stock; Jason’s car had functioning TEMS (Toyota Electronically Modulated Suspension – kind of electronic active shock absorbers) whereas mine had factory standard suspension. Both cars ended up approximately 12mm higher front ride height after the conversion due to the lighter engine etc.
The suspension has been left alone, with just a wheel alignment. Ideally I would put lower springs in, but end of the day the car is just a daily driver and it handles fine. The slight increase in height is not really noticeable.
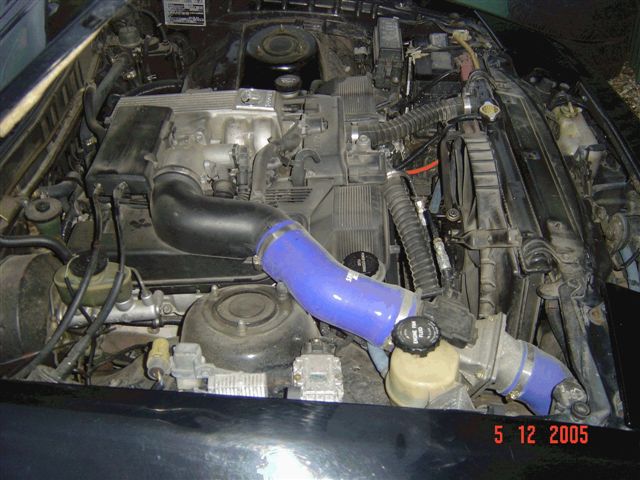
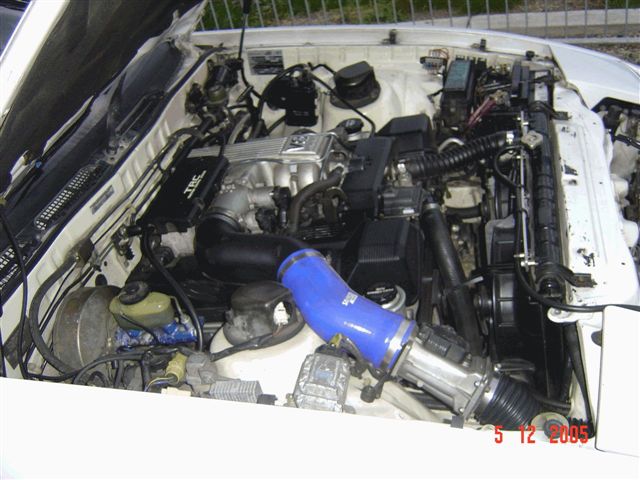
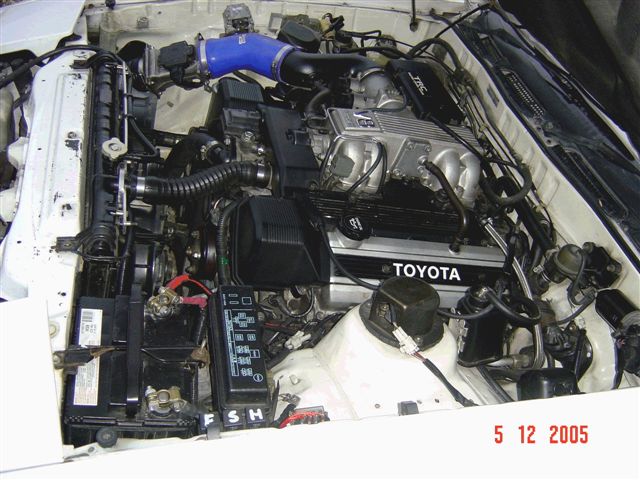
Induction System
Both cars use the factory plastic intake resonance box directly off the throttle body. This required a seam on the rear to be filed down to clear the brake booster. The unit was used as it resulted in the hose connecting the air flow meter to the engine to clear the strut tower. The AFM was attached via a 45 degree 80mm diameter silicone bend to the resonance chamber.
A K&N type air filter was fitted below the right headlight ahead of the radiator support panel and connected to the AFM via some plastic adapters and hose from Supercheap Auto in Jason’s case and via some 3” aluminium tube and cheap silicone bends from Repco in my case. Basically after I plumbed my system Jason found the Supercheap components and achieved the same outcome for 1/3 the cost!
The difference in performance between having cold air induction vs. engine bay induction was quite noticeable. The AFMs are not attached to the car, being held in place by the pipe work. There is a convenient hole in the radiator support panel to pass the tubing through.
Electrical System
The factory V8 alternator fitted fine, and so the output and 3 pin control plug were spliced into the original car loom. The battery was able to remain in its stock location.
Engine Management
Both cars use factory engine management, spliced into the car wiring. Jason’s auto relies on the secondary speed sensor (in the speedo head) to trigger the trans shift points. This is because the primary sensor (in the trans) is actually for the ABS system, and the signal is processed via the ABS computer before being fed to the trans computer.
Given the lack of the V8 ABS system we had to rely on the back up sensor. This works absolutely fine, but produces and error code to tell you the primary sensor is MIA.
I won’t go into any more detail on the EFI wiring, other to say it was fairly straight forward (in relative terms!), especially as both cars were injected originally, hence the power feeds and fuel pump control systems were largely all there. We took the opportunity to integrate high security rated alarms into the wiring, which will make the cars extremely difficult to steal. Hopefully.
Cruise Control
I aim to fit factory cruise control, using basically the Supra vacuum based system with the V8 actuator spliced in. My car wasn’t fitted with cruise initially and none of the wiring is present, so I will have to recreate the entire system using parts from one of the donor cars. I fully expect it to work, as I have wired 2 x Surfs with factory cruise spliced into the V8 and they worked fine.
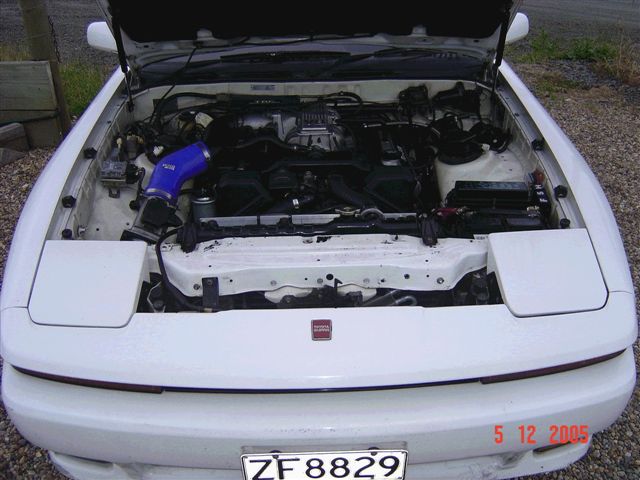
Driving Experience
Both cars drive ‘like a bought one’ and apart form the blue silicone hoses in the engine bay and some misc. brackets for the fans in Jason’s car could just about pass as factory in appearance. Ironically all the components were in production at the same time – Toyota could have easily built a V8 Supra in the early 1990s, and based on our experiences it would have been one hell of a car.
The handling and braking performance of both cars is improved due to the lighter weight over the front wheels and the engine centre of gravity being further back to boot. My original 2.5 litre twin turbo engine made slightly more power and torque, but the auto robbed it, the lag was horrendous and the power curve didn’t have a lot of width.
The V8 manual is effortless, instantaneous and fun. It is also around 15% more economical than the 2.5 turbo auto. Both Jason’s car and mine return similar economy, however, I have a marginal performance edge.
End of the day, a fairly straight forward conversion, especially considering the rest of the vehicle is more than adequately engineered for the task.

Phil Bradshaw ([email protected])